Photo by Matt Eberle on Unsplash
Before I dive into the making process, here's my final result! A sturdy cardboard pumpkin for the Halloween vibe!
 ...and the skeleton on the right perfectly illustrates me when using Rhino and the laser cutter for the first time.
Pumpkin!
It's October and Halloween is around the corner, so why not make a pumpkin!
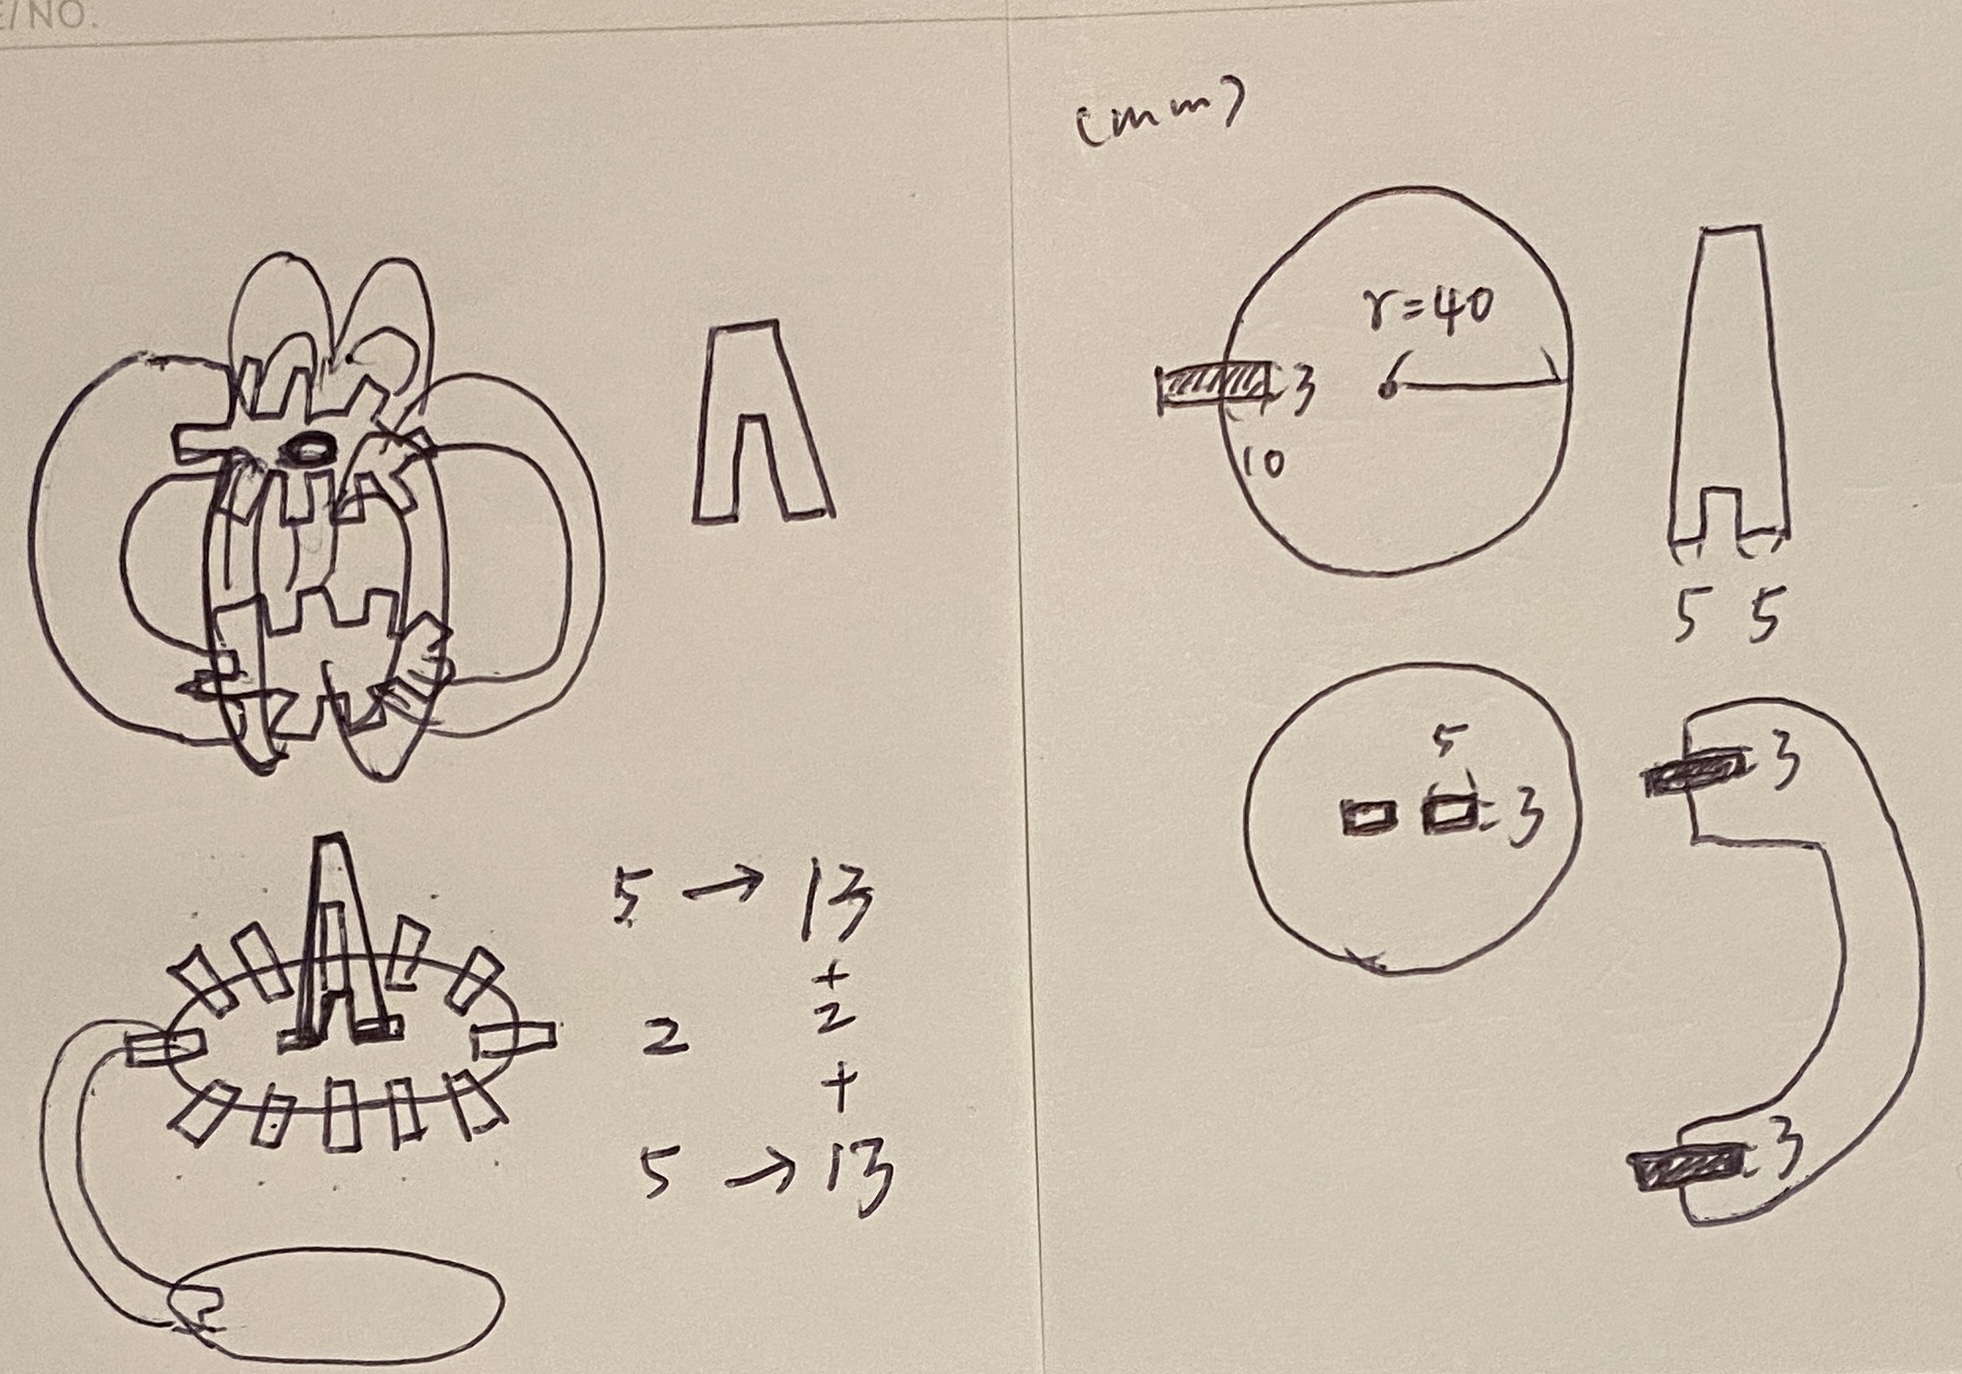
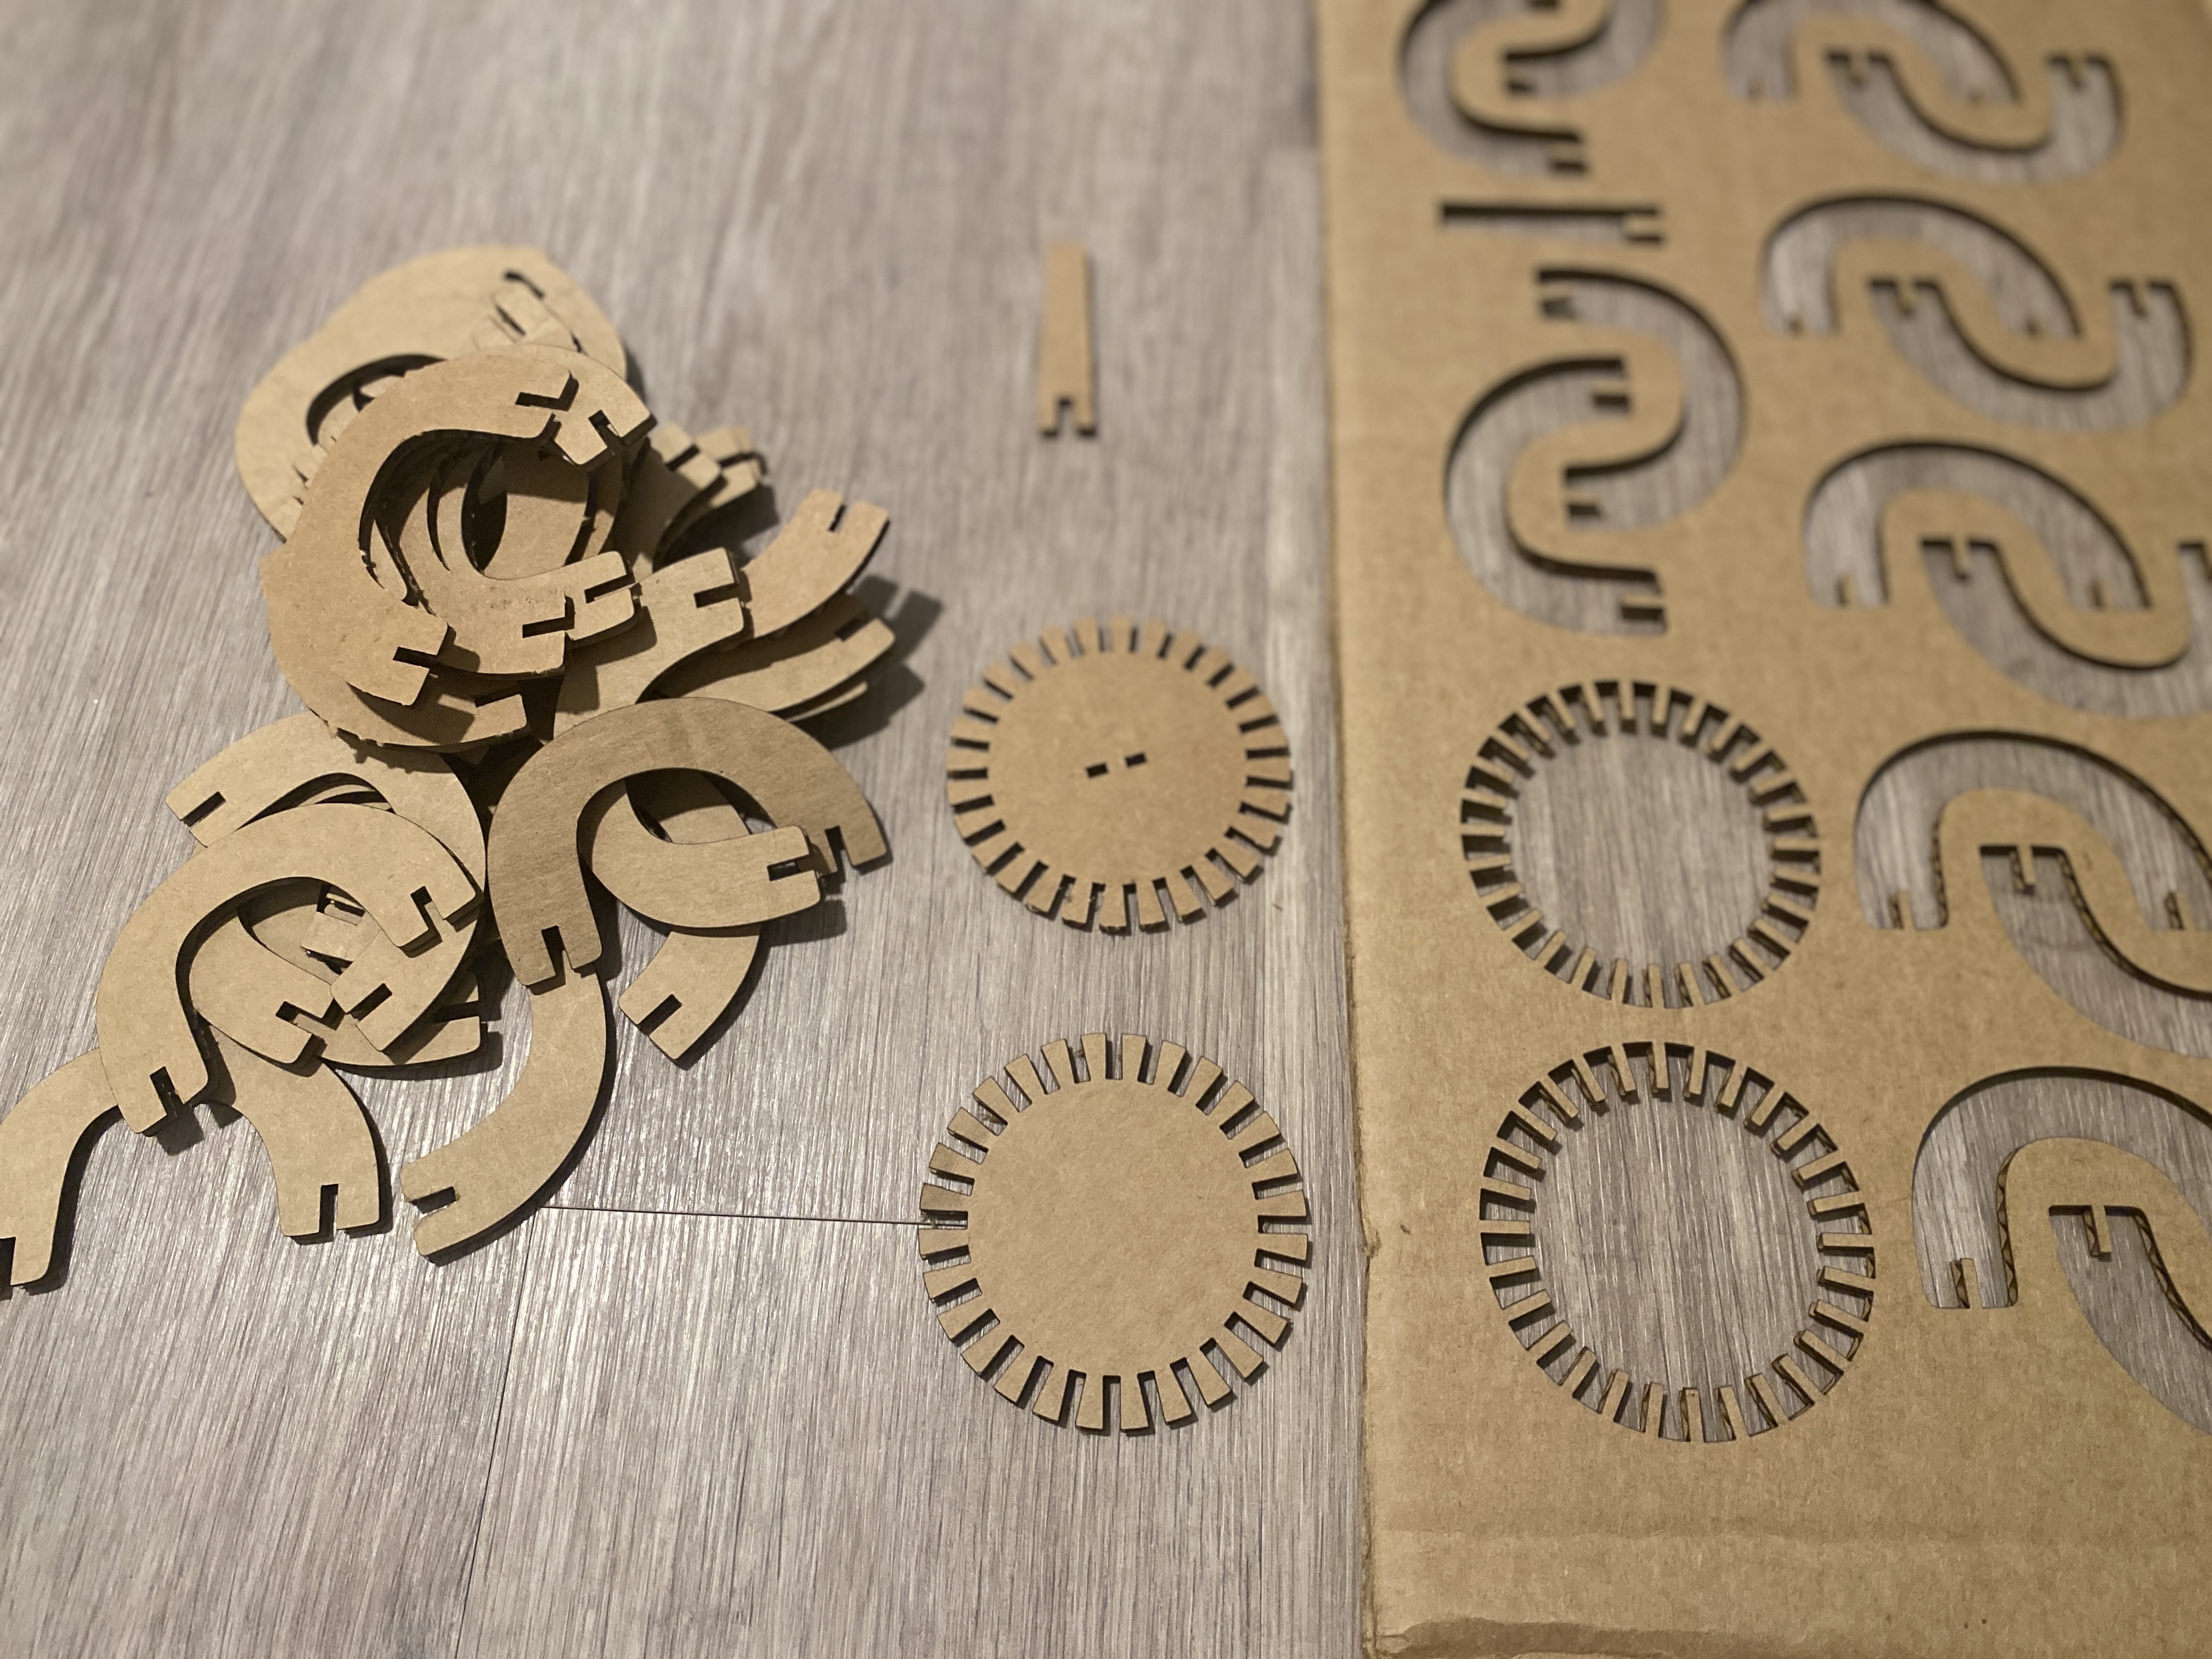
I started with some concept sketches, thinking about how to fit the parts together in my head. The idea is to have a circle plane for both top and bottom, and then fit 28 pieces of "pumpkin skins (rinds)" around them. Finally, put a stem on the top. If all goes well, I can even put a small light in the middle of it to light the pumpkin up!
Modeling in Rhino
Using commands such as Trim, Join, ArrayPolar, Rectangle in Rhino, I was able to draw the parts of the pumpkins.
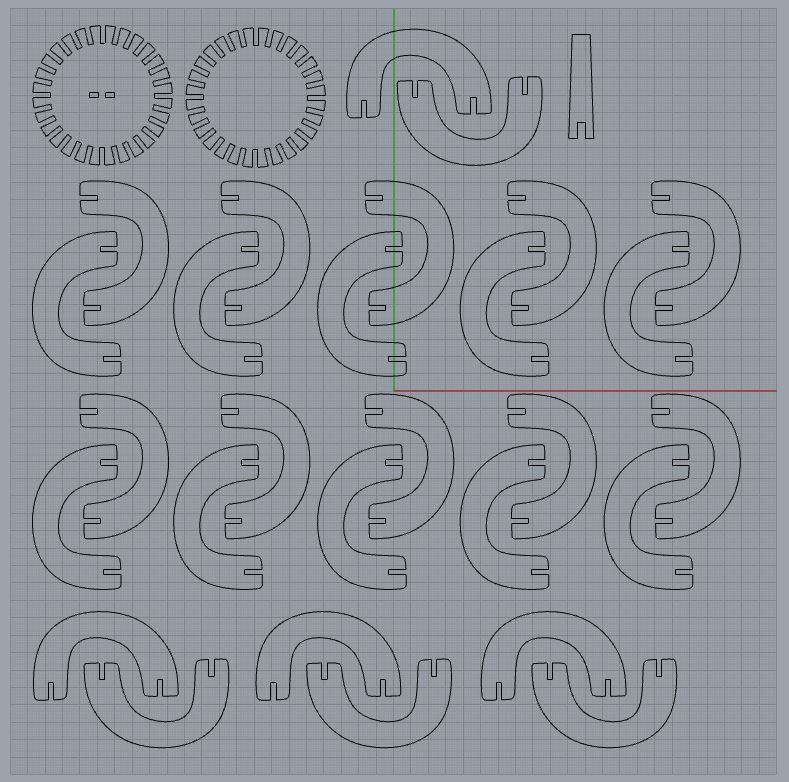 All the parts of the pumpkin I created in Rhino 7
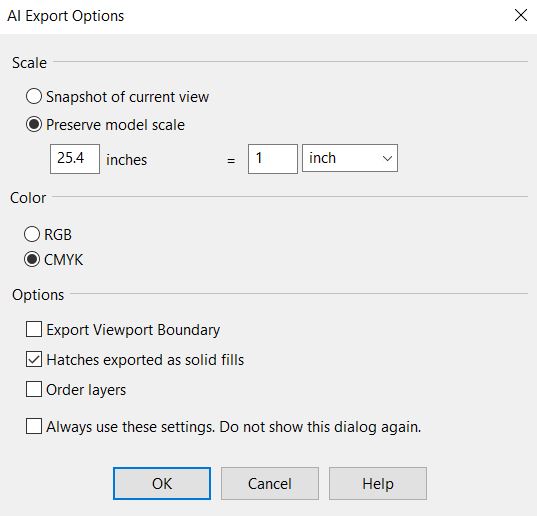
The unit was set in mm in Rhino, therefore conversion to inch would be needed as the laser cutters at The MILL makerspace were inch-based. The conversion was fairly simple. When exporting from Rhino to Adobe Illustrator, set the settings as below:
Now, the main concern would be if the parts could fit nicely together. Also, with 28 slots needed to be cut out on both the top and bottom circle planes, and with the slots being pretty close to each other, I worried that the edges of the top/bottom planes might break.
I would need to test it out with the laser cutters to see if these work!
The Rhino source file can be found here.
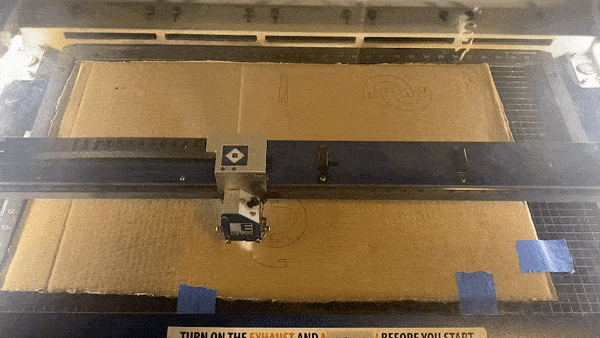
Laser Cutting!
I started with a test cut to see if the slots can fit together nicely. Before actually making the cuts, the trick is to keep the laser cutter open, start the laser cutter and see if it moves to the right position.

Here are a few learnings and tips for using the laser cutters that I didn't know before:
First of all, the canvas size of Adobe Illustrator must match the physical cardboard size. When setting the printer, make sure that the preview section shows the canvas you want to cut on entirely (covering everything you want to cut) and in the right orientation. Under the preview window, there will be document size (ex: 27 x 18 inches) and media size, make sure that they match entirely. If not, adjust them separately.
Also, remember to set the stroke weight in Adobe Illustrator to 0.001 px.
Finally, adjust the speed, power and frequency of the Vector Setting of the laser cutter based on your material. My Speed/Power/Frequency setting was 30/100/10, and later I lowered the speed to 27 to make it cut more thoroughly. Although I'd say I could further lower it as the cut was still not as thorough as I had hoped.
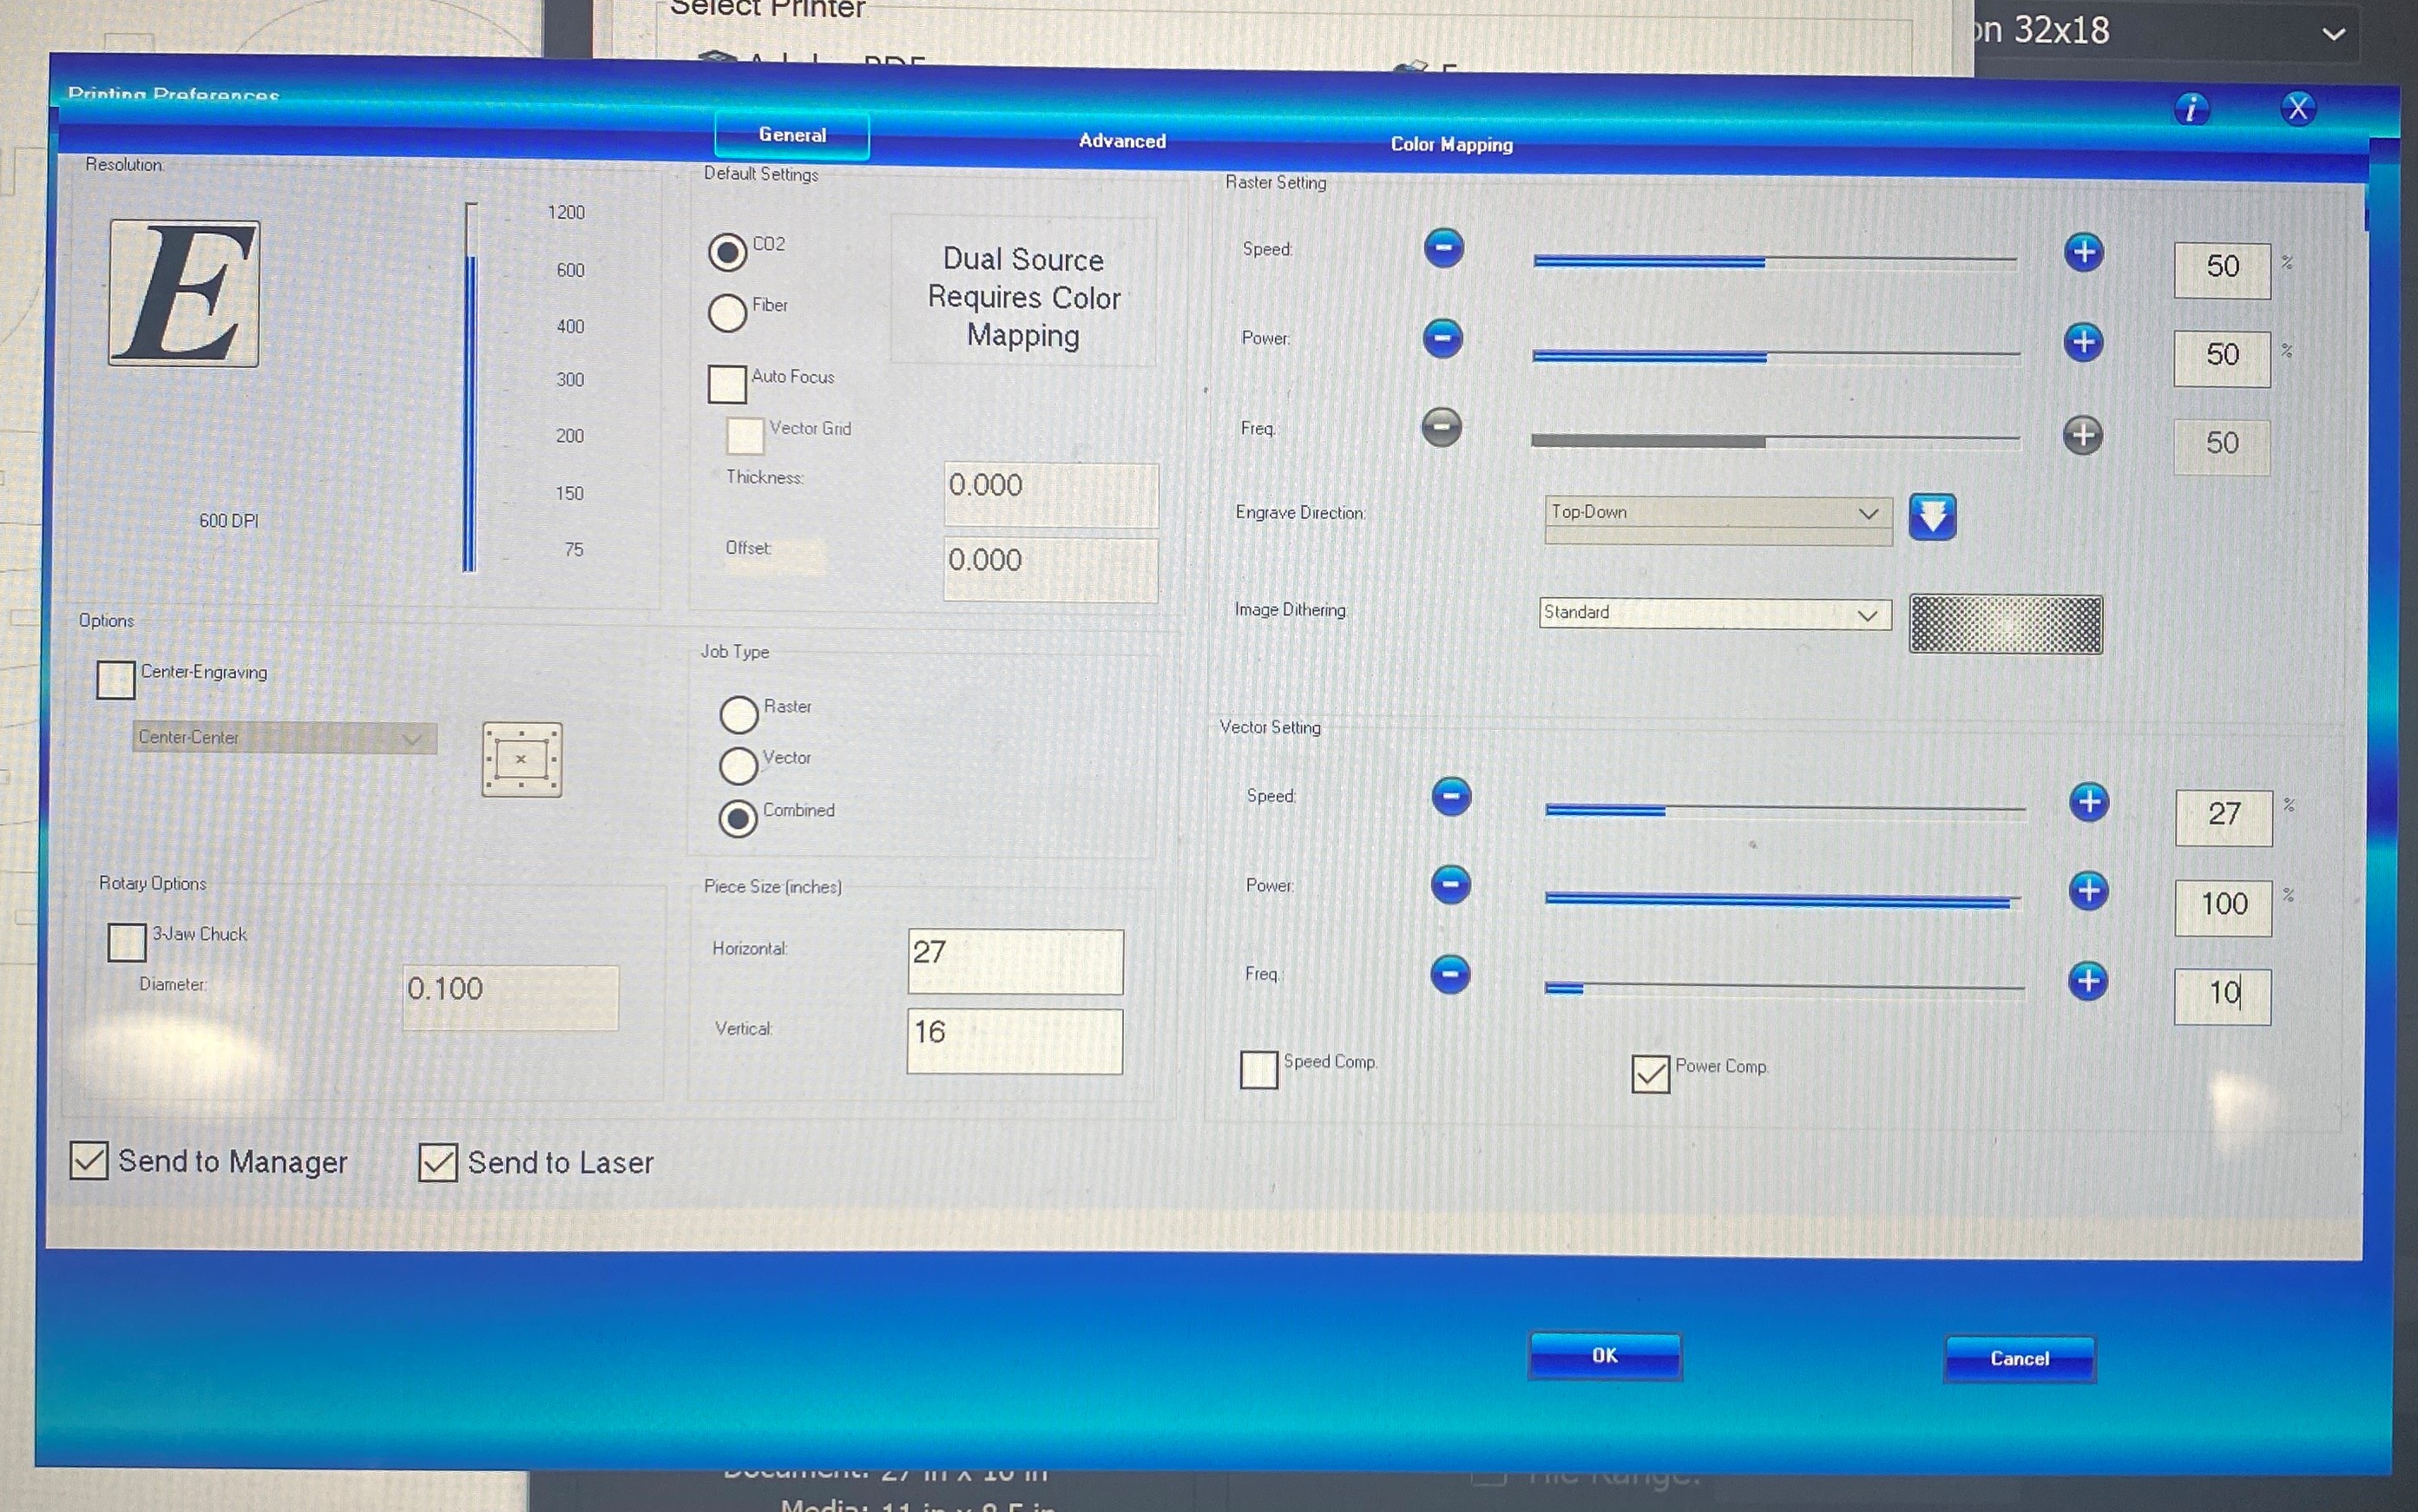 Laser cutter settings
Putting them all together
I ended up having to press the cardboards for a bit (just the part with the slots) to make it thinner in order for the slots to fit nicely. It ended up working pretty well and my pumpkin came out really sturdy!
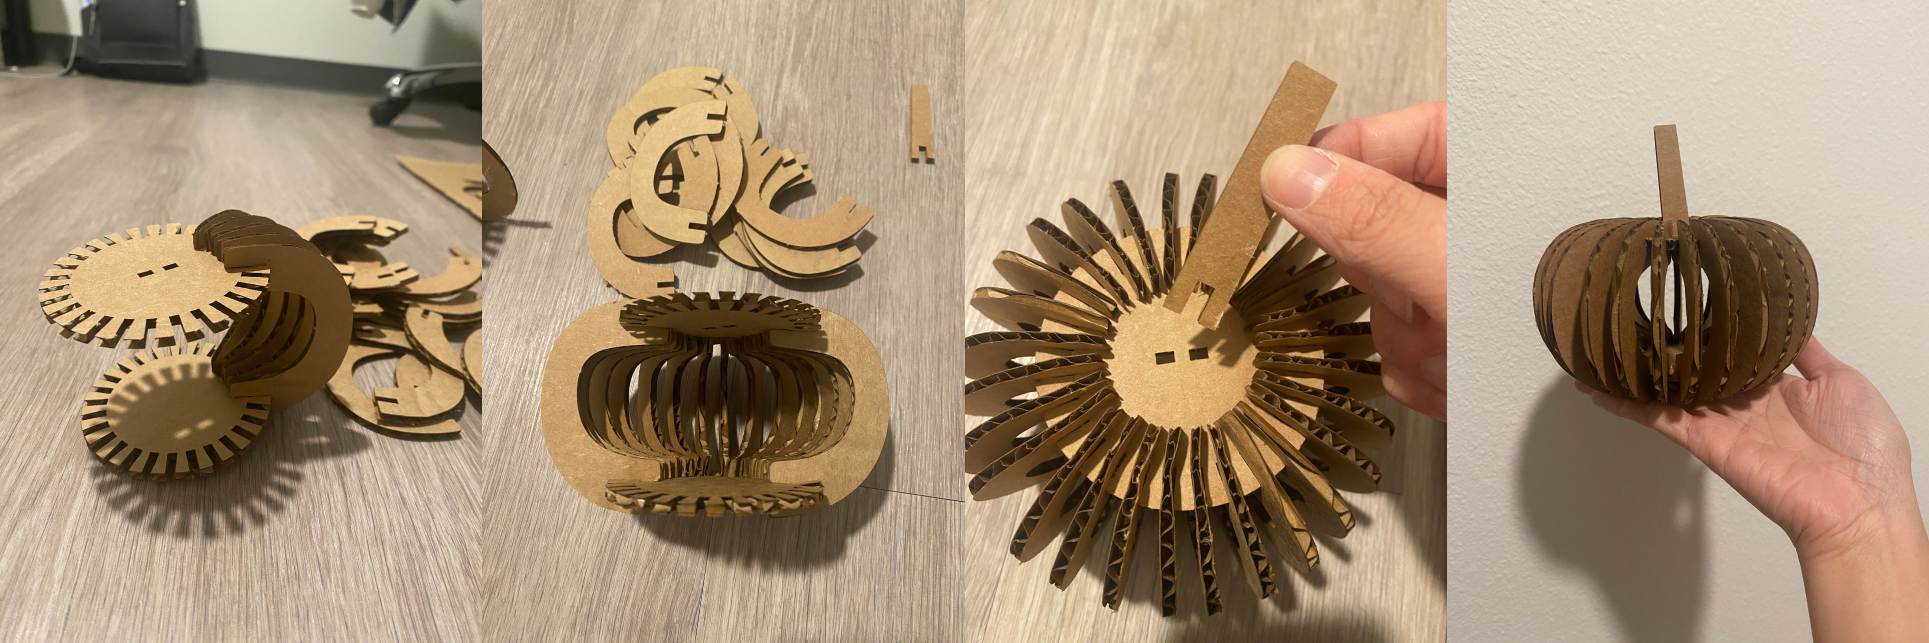 Putting them all together!
My slots were all 3mm as my cardboard was about 3mm thick. Next time I'll adjust the slots in Rhino to maybe 2.5mm or below, test out different size of slots first and make the adjustment accordingly.
Acknowledgements
Thank you to the TA for the helpful comments and the demo video in the Discord channel, they help a lot! Also many thanks to the peers who ask questions in the channel! Thanks to the staff at The MILL for the help with laser cutters!